One of the most difficult parts of posting consistently on Instagram for me was struggling to take pictures of myself. My amazing fiancé, friends, and family often take my pictures for me which I am so thankful for! However, I usually need to take 1-3 pictures a week on my own. And over time I have learned to do this and take gram worthy photos with the thanks to iPhone portrait mode. So if you want to learn how to take Instagram photos of yourself like a blogger then keep reading!
Also, make sure that you follow me on Instagram (link here) so that you can always see my posts for inspiration and so you can see how I use these tips.
Now lets jump into these helpful tips for how to take Instagram photos of yourself.

*** This article may contain affiliate links that I receive a small commission off of. As an Amazon Associate I earn from qualifying purchases. I always appreciate any support to keep this site running! Some items in this post were gifted- each is noted that it was sent to me as a gift! Thank you!***
How To Take Instagram Photos of Yourself Like a Blogger:
Tips for taking your own photos:
Tip 1: Confidence is key!
This is going to be essential to taking awesome Instagram posts in general and it is especially true when you are by yourself taking pictures of yourself.
You are an incredible, awesome person and you deserve to have pictures that capture that.
And embracing your self confidence while taking pictures is an essential part of getting high quality, gram worthy pictures.
Don’t be afraid to hype yourself up! Say some positive affirmations and compliment yourself before your session of taking your own photos. Do this out loud in your car or even just in your mind while you are walking to the spot you are taking your pictures. Confidence is a beyond important part of getting awesome pictures!
Tip 2: Keep your camera or phone easily accessible.
This is such an important tip. If your camera or phone are buried at the bottom of a giant bag or backpack then you’re going to be less likely to dig it out.
For a long time I just used the camera bag that my camera came in but now I have switched to using this camera bag that My Gift Shop gifted me ( Shop it here )! I love that it is crossbody and the color goes with everything.
Make sure to check the dimensions on it to make sure that it will fit your camera but it definitely fits all iPhones. And of course it is also so cute and works with any outfit since it’s a pretty neutral color. Definitely recommend checking it out!
Here is the bag and a self timer picture- and it’s one of my current favorite Instagram snaps I love the sunset lighting:

Tip 3: Watch your lighting carefully.
Lighting can absolutely make or break your pictures.
Harsh mid-day lighting will mean that you are fighting it the whole time. So I really recommend doing your self portrait session at the beginning of the morning or a bit before sunset. Often called golden hour due to the soft golden light.
Also, watch where the sun is. You don’t want it overhead if at all possible. Try to keep it behind you or even in front if you are able to not squint if looking into the sun! Just be aware of the sun if you are using natural lighting!
Tip 4: Use lots of motion while posing.
Motion is your friend!
No one wants to look at a picture of you that could be swapped with a cardboard cutout.
So add in motion while your timer is going- try swinging around, kick a leg, stand on your tip toes, move your purse or other accessory, run your hand through your hair, etc. Anything along those lines will make your photos more interesting and dynamic.
Here is some examples of movement in pictures that isn’t as obvious (like running!):

In this one I am moving the balloons (aka the accessory) to get movement.

In this one I am moving both of my arms for a more dynamic image.
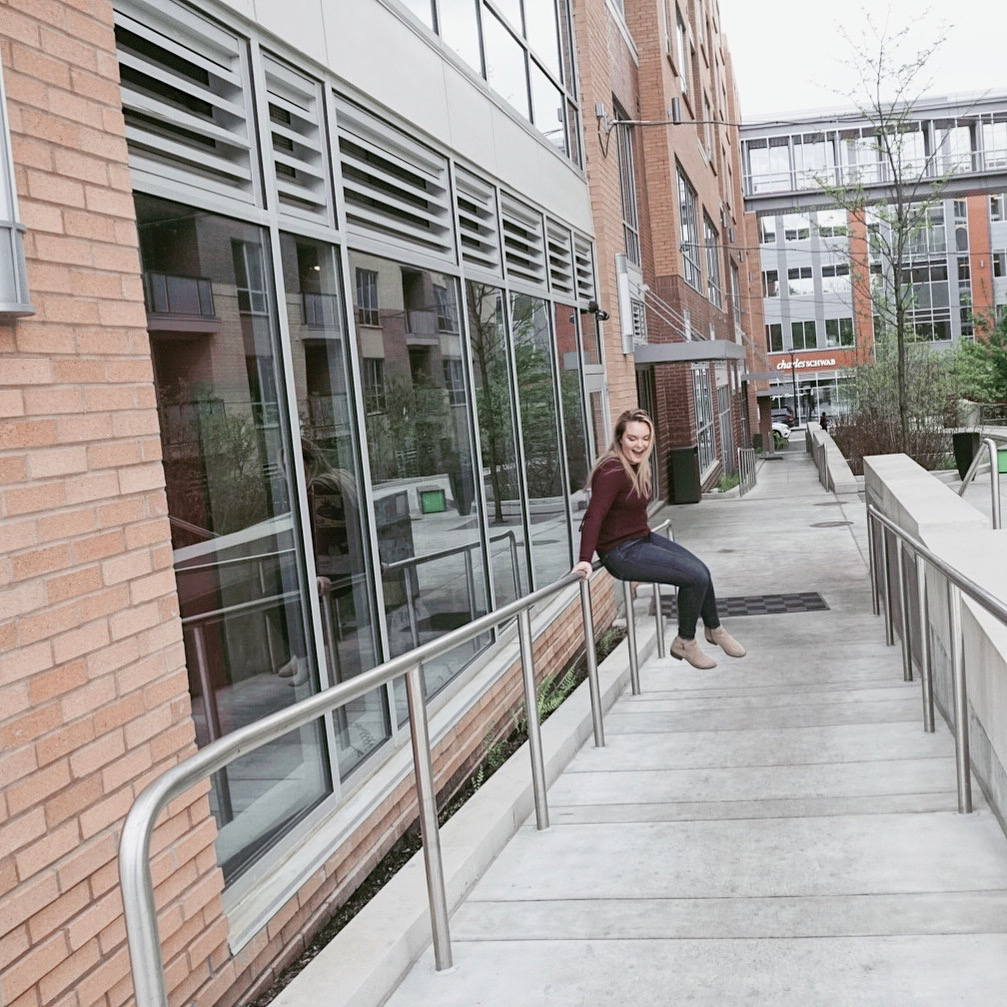
This motion is obvious (sliding down the rail) but it takes a plain photo and really makes it fun to look at!
Tip 5: Invest in a tripod.
Tripods are thankfully not very expensive now and are 100% worth it if you are taking photos of yourself.
This is the one I use for my camera – link here.
And this is the one I use for my iPhone- link here. This has a remote which is so helpful as well for taking your own pics!
You don’t need a $200 tripod just something easy to carry around but it will really ensure you can actually take pictures without needing to prop up your camera or iPhone somewhere.
iPhone portrait mode steps and tips:
iPhone portrait mode can be your best friend when taking your own pictures!
To get to Portrait mode open the apple camera app > select portrait on the bottom of the screen (directly to the right of the photo option > select the settings you want (tips for this below) > and focus yourself in the middle and 5-8 feet away from your phone.
Get familiar with the different settings.
There are a lot of different settings within portrait mode that you will want to get familiar with.
The first ones are the light options. You will see the following options on the bottom of the screen:
Natural light
Studio light
Contour light
Stage light
Stage light mono
High-key light mono
I highly recommend going through and playing with each of those options.
I will admit that I pretty much only ever use natural light and studio light. Natural light works the best during the day time and studio light during the evening or in situations with minimal light.
There is also the f on the top right corner. This f controls how much “blur” the background gets. I recommend in general turning it higher (which actually means less blur) in general for blogger-esque photos. You still want some background but you want you to be the focal point of the picture.
Or you can eliminate distracting backgrounds!
You can also choose to have the background be basically eliminated by really turning down the f especially if you have a product or something similar that you want to emphasize.
Here’s an example of using portrait mode inside, specifically in a situation where I didn’t want the background to be the focus at all:

No matter how you use the iPhone Portrait mode it is a great tool for taking better Instagram pictures. By using portrait mode you can really elevate your images and make sure that the viewers eye goes directly to you in the image.
I hope that these tips for how to take Instagram photos of yourself and iPhone portrait mode pictures are helpful for you.
I want to take the opportunity to remind you again that you can take amazing pictures and that being confident in yourself is so important. You are beautiful and wonderful and I can’t wait to see you rock your IG pics!
If you want to stay in touch in the future make sure to keep scrolling for how you can always know about new content, posts, and videos.
Korra-Shay
Let’s get social!
If you liked this post on how to take Instagram photos of yourself like a blogger then you probably (hopefully!) will like these too!
- 17 Blogging Tasks To Do When You Have Extra Time
- Instagram Content Calendar for Bloggers
- 9 Hard Truths About Growing A Blog I’ve Learned
- 15 Instagram Story Ideas To Grow Your Account
- Social Media Printable Calendar For Bloggers
Let’s really connect!
Below is a quick form to subscribe to my weekly roundup! It’s just one email a week with my 3 newest posts, email exclusive freebies, weekly finds and favorites, and so much more. I would love to stay in touch moving forward!

You must be logged in to post a comment.